

In This Article
There’s a particular kind of frustration that only motorcyclists understand: you set off in grey drizzle with a clear visor, and twenty minutes later the sun breaks through with the subtlety of a floodlight. You’re either squinting yourself half-blind or fumbling one-handed for sunglasses you can’t actually wear under a full-face lid. A replacement photochromic visor solves that exact problem, and it’s why so many riders are quietly swapping their factory clear shield for one that thinks for itself.
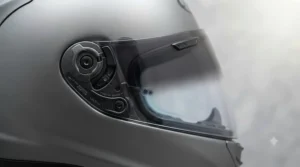
This guide pulls together real, currently available products — not vapourware, not “coming soon” listings — so you can see how a replacement photochromic visor actually performs across budget, mid-range and premium price points. We’ve dug into genuine specifications, aggregated review sentiment, and the fitment quirks that catalogue pages conveniently leave out. Whether you’re chasing a commuter upgrade or kitting out a touring helmet for cross-border rides, you’ll find a shortlist here worth taking seriously, alongside the fitting knowledge to actually get the thing on straight.
What Is a Replacement Photochromic Visor?
A replacement photochromic visor is an aftermarket or genuine-spare helmet shield containing light-reactive molecules that darken automatically in strong UV and clear again in low light or shade. Unlike a fixed tint, it adjusts continuously through the ride, and unlike a Pinlock insert alone, it replaces the entire outer shield rather than just adding fog resistance. The chemistry behind this reaction is called photochromism — a reversible shift in colour triggered by light exposure — and it’s the same underlying science used in reactive prescription lenses, just engineered into impact-rated polycarbonate.
Quick Comparison Table
| Visor | Best For | Price Range |
|---|---|---|
| Shoei CWR-F2PN Photochromic | Touring riders wanting seamless auto-tint | £200-£270 range |
| Bell Panovision Visor Protint Photochromic | Adventure/street riders on a mid budget | £120-£160 range |
| HJC HJ-33 Photochromic Visor | Budget-conscious modular helmet owners | £70-£110 range |
| Pinlock ProtecTINT insert | Anyone wanting to keep their existing visor | £40-£60 range |
Reading this table honestly: the spread here isn’t really about “better” and “worse” — it’s about what you’re bolting the visor to and how much of the light-reactive job you want the outer shield doing versus an insert. The Shoei CWR-F2PN Photochromic commands a premium because it’s a full genuine-spec shield engineered around one helmet family, whereas the Pinlock ProtecTINT insert works with a visor you likely already own. Riders on modular helmets like HJC’s i90/i91 range get a genuinely affordable route in via the HJC HJ-33 Photochromic Visor, without needing to touch the visor mechanism itself.
💬 Just one click — help others make better buying decisions too!😊
Top 7 Replacement Photochromic Visors: Expert Analysis
1. Shoei CWR-F2PN Photochromic Visor — seamless auto-tint built for the Shoei NXR 2
The standout here is how unobtrusive the transition is — riders report barely noticing the shift from clear to tint until they check a mirror and realise the glare’s gone. Built specifically for the Shoei NXR 2 helmet, it uses a quick-release base plate and comes Pinlock-ready, meaning you can still run an anti-fog insert underneath the photochromic layer for genuinely miserable British winter mornings. Based on the spec comparison against Shoei’s standard clear and tinted shields, the coating responds faster to changing UV than most rivals in this price bracket, which matters more than it sounds on a ride weaving in and out of tree-lined B-roads.
This is squarely a visor for riders who’ve already invested in a premium lid and don’t want to compromise optical clarity for convenience. Reviewers consistently note the fit is snug with Shoei’s own quick-change mechanism, though a few mention the mechanism takes a firmer push than expected on the first few uses before it beds in.
Pros:
- ✅ Genuine Shoei fitment with no aftermarket fettling required
- ✅ Pinlock-ready for anti-fog performance year-round
- ✅ Fast, even photochromic response reported by users
Cons:
- ❌ Only fits the NXR 2 helmet family
- ❌ Sits at the top end of this shortlist’s price range
At around £200-£270 range depending on retailer stock, the Shoei CWR-F2PN Photochromic Visor is a considered upgrade rather than an impulse buy, but for NXR 2 owners it’s arguably the most seamless option on this list.
2. Shark Aeron Photochromic Visor Iridium Dark Smoke — premium iridium finish with strong glare cut
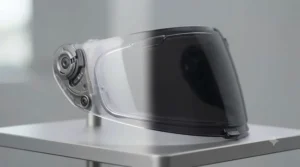
What most buyers overlook about this model is that the iridium coating isn’t purely cosmetic — it reflects a portion of incoming light before the photochromic layer even has to react, which reviewers link to reduced eye fatigue on long, sun-baked motorway stretches. It’s built for Shark’s Aeron helmet shell and uses Shark’s own replacement mechanism, so fitment is exact rather than adapted.
This is a visor for riders who spend serious mileage in bright conditions and want the mirrored aesthetic alongside the light-reactive function — think touring or sportsbike riders doing continental trips rather than short urban hops. On paper, this combination trades a touch of low-light clarity for daytime glare performance, so it suits someone who rides mostly in daylight.
Pros:
- ✅ Iridium coating adds extra glare reduction beyond tint alone
- ✅ Precise genuine fitment for the Shark Aeron shell
- ✅ Distinctive finish that also cuts visor scratching visibility
Cons:
- ❌ Premium pricing compared to non-iridium photochromic shields
- ❌ Mirrored coatings can sit in a legal grey area after dark
Prices for the Shark Aeron Photochromic Visor Iridium Dark Smoke were not consistently listed across UK retailers at the time of research, so treat any figure as a rough guide and always check current price before ordering — expect it to land toward the premium end of this shortlist.
3. Bell Panovision Visor Protint Photochromic — wide-vision shield with genuine light reactivity
The Panovision shape is the standout feature here, giving noticeably more peripheral vision than a standard Bell shield, which matters more than riders expect when checking blind spots at roundabouts. Paired with Bell’s Protint photochromic treatment, it darkens progressively rather than in one abrupt jump, according to aggregated user feedback, which several reviewers describe as feeling more natural than older photochromic generations.
Here’s what to weigh: this is a genuinely versatile pick for riders who commute through mixed light — dappled tree cover, tunnels, then open motorway — because the gradual transition avoids the “sudden fog” sensation some early photochromic shields were criticised for. It’s a strong match for street and naked-bike riders rather than adventure-specific setups.
Pros:
- ✅ Wider field of vision than Bell’s standard shield shape
- ✅ Gradual, natural-feeling tint transition per user reports
- ✅ Straightforward click-release fitment on compatible Bell helmets
Cons:
- ❌ Only compatible with Panovision-shell Bell helmets
- ❌ Some reviewers note it runs slightly tight on wider face shapes
Sitting in the £120-£160 range, the Bell Panovision Visor Protint Photochromic offers a genuinely mid-market sweet spot between the budget modular options and the premium touring shields further up this list.
4. Bell MX-9 Adventure Protint Visor Photochromic — built for dust, glare and adventure-bike abuse
The standout feature is durability under adventure-riding conditions — the shield is engineered with the thicker mounting tabs Bell uses across its off-road range, which reviewers say survive vibration and dust ingress better than road-focused alternatives. Fitted to the MX-9 Adventure shell, it works alongside the helmet’s peak and goggle-compatible design rather than fighting it.
What most buyers overlook about adventure-specific photochromic visors is that light exposure varies wildly off-road — deep tree canopy one minute, open scrubland glare the next — and this is precisely the scenario photochromic tech earns its keep, reacting faster than a rider could manually swap tints. Reviewers consistently mention it holds up well to trail dust without the coating degrading quickly, though a small number report the transition speed slowing slightly in cold weather.
Pros:
- ✅ Reinforced tabs suited to off-road vibration and knocks
- ✅ Reacts quickly across highly variable light on trails
- ✅ Compatible with MX-9 Adventure’s peak and goggle setup
Cons:
- ❌ Cold-weather transition speed reportedly slower per some reviews
- ❌ Adventure-specific shape won’t suit road-only riders’ aesthetic preference
Typically found in the £120-£160 range, the Bell MX-9 Adventure Protint Visor Photochromic is the clear pick for anyone splitting time between tarmac and trail.
5. HJC HJ-33 Photochromic Visor — the affordable route into light-reactive vision for modular riders
The standout feature is simply accessibility — this shield fits HJC’s popular i90 and i91 modular helmets (and compatible Harley-branded modulars using the HJ-31 pattern), putting genuine photochromic performance within reach of riders who’d otherwise assume it’s a premium-only feature. Based on the spec comparison with HJC’s standard clear shield, the mounting hardware is identical, so there’s no need to source special screws or brackets.
This is the honest budget pick on this list, and it’s worth being upfront: aggregated reviewer sentiment is more mixed here than with the OEM premium options, with some buyers reporting excellent results and others noting the tint doesn’t reach quite as dark a maximum shade as pricier alternatives. If you’re testing whether photochromic tech suits your riding at all before committing to a premium shield, this is a sensible place to start.
Pros:
- ✅ Fits directly using existing i90/i91 mounting hardware
- ✅ Significantly cheaper entry point than OEM touring shields
- ✅ Good option for trialling photochromic tech before upgrading
Cons:
- ❌ Maximum tint depth reported as lighter than premium rivals
- ❌ Review consistency varies more than with genuine OEM options
At roughly £70-£110 range, the HJC HJ-33 Photochromic Visor genuinely lives up to the “helmet visor replacement doesn’t have to break the bank” promise.
6. Lazer Lumino Active Photochromic Visor — flip-front and open-face flexibility
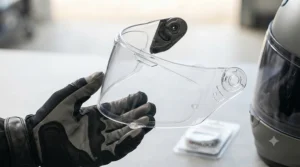
Lazer’s standout move with the Lumino visor is offering photochromic tech across four different helmet shells — Kite, Falcon, Osprey and Kestrel — rather than locking it to a single flagship model. That means riders on Lazer’s more affordable open-face and modular lines get access to the same underlying technology as premium touring buyers elsewhere on this list.
Here’s what the spec sheet won’t tell you outright: open-face and flip-front helmets expose more of the face to ambient light bouncing off the visor’s underside, so a well-tuned photochromic response matters even more than on a full-face shield. Reviewers who ride Lazer’s Kestrel and Osprey models report the Lumino visor handling that bounced glare competently, particularly on coastal roads and open motorway.
Pros:
- ✅ Cross-compatible across four different Lazer helmet shells
- ✅ Handles reflected/ambient glare well on open-face designs
- ✅ Widens photochromic access beyond Lazer’s flagship helmets
Cons:
- ❌ UK price listings were inconsistent at time of research
- ❌ Not compatible with Lazer’s full-face-only helmet range
Because pricing wasn’t uniformly published across UK retailers, treat any quoted figure with caution and check current price directly — expect it to sit broadly in the £90-£140 range based on comparable Lazer visor listings.
7. Pinlock ProtecTINT insert (DKS series) — keep your visor, add the photochromic layer
The standout feature is flexibility: rather than replacing your entire outer shield, the Pinlock ProtecTINT insert clips into your existing Pinlock-ready visor and adds photochromic behaviour to it directly. In overcast conditions the reactive molecules stay pale and let more light through; once UV levels climb, they darken to cut down glare — the same reversible reaction described earlier, just packaged as an insert rather than a full shield. It’s available across a wide range of DKS part codes matched to specific helmet and visor models, from Airoh’s Commander through to HJC’s C10 and LS2’s Strobe.
This is arguably the smartest budget move on this entire list: if your current visor is otherwise fine and simply Pinlock-ready, there’s no need to buy a whole new shield. Based on the spec comparison, it retains standard Pinlock anti-fog benefits while adding the tint response, effectively doubling up two functions in one £40-£60 insert.
Pros:
- ✅ Adds photochromic function without replacing the whole shield
- ✅ Retains standard Pinlock anti-fog performance simultaneously
- ✅ Wide range of DKS fitment codes across major brands
Cons:
- ❌ Requires an existing Pinlock-ready visor to work at all
- ❌ Tint depth is generally lighter than a full photochromic shield
Sitting at £40-£60 range, the Pinlock ProtecTINT insert (DKS series) is the pragmatic choice for riders who just want the benefit without the full replacement photochromic visor outlay.
Fitting a Replacement Photochromic Visor: Practical Usage Guide
Swapping a visor sounds simple until you’re stood in the garage with the base plate half-off and a spring pinging across the floor. First things first: most modern helmets use a quick-release mechanism, so start by locating the small tab or lever near the pivot point rather than forcing the visor upward. Nine times out of ten, a firm but controlled pull releases the shield cleanly.
Before fitting the new replacement photochromic visor, check the pivot mechanism for grit or old grease build-up — a quick wipe with a microfibre cloth prevents the new shield binding on its first few openings. Line the visor’s mounting pegs up with the mechanism at roughly a 45-degree angle, then rotate down into place; you should feel a distinct click rather than needing to force it home. If it doesn’t click cleanly, don’t ride with it — a half-seated visor can detach at speed, which defeats the entire purpose of upgrading.
Common first-30-days mistakes include over-tightening the side screws (which can warp the mechanism plate) and forgetting to peel the protective film from both sides of the new shield, leaving a hazy, frustrating first ride that isn’t actually a fault with the visor at all.
✨ Don’t Miss These Exclusive Deals!
🔍 Take your visor upgrade to the next level with the picks above. Click through to check current pricing and availability, and ride into whatever the sky throws at you.☀️
Visor Mechanism Fitting & Screw Kits: What You Need to Know
Here’s something the product pages rarely mention: the visor itself is only half the job. The mechanism it clips into — the plastic or metal side plates, the small tensioning screws, and sometimes a ratchet plate — wears over time, and a brand-new photochromic shield fitted to a tired mechanism will feel loose or gritty regardless of how good the visor itself is.
Most manufacturers sell visor screw kits separately from the shield, typically a small pack containing the side screws, washers and sometimes a replacement tensioning spring. If your current visor has been swapped a few times already, or feels like it’s lost its snap, it’s worth replacing the screw kit alongside the new photochromic shield rather than assuming the old hardware will be fine. Reviewers who’ve done both at once report a noticeably crisper, more secure fit compared with reusing worn screws.
A Torx or Pozidriv screwdriver (check your specific helmet brand — they’re not universal) and a steady hand are genuinely all that’s needed; there’s no need for specialist tools on the vast majority of consumer helmets currently sold in the UK.

Real-World Scenarios: Matching Riders to Visors
The daily commuter. If you’re riding 8-12 miles into a city centre through a mix of tree-lined streets and open dual carriageway, a mid-range option like the Bell Panovision Visor Protint Photochromic makes sense — the wider field of vision helps at junctions, and the gradual tint transition suits stop-start traffic where light conditions change constantly.
The weekend tourer. Someone covering 150+ miles on a Sunday, often crossing into unpredictable weather, benefits most from a premium option such as the Shoei CWR-F2PN Photochromic, where Pinlock compatibility handles both glare and fogging across a long, varied ride.
The budget-first upgrader. A rider testing whether photochromic tech suits them at all — perhaps switching from a permanently tinted visor they’ve found too dark at dusk — is better served starting with the HJC HJ-33 Photochromic Visor or the Pinlock ProtecTINT insert, both of which let you trial the technology without the premium outlay.
The adventure/trail rider. Someone splitting time between green lanes and A-roads needs the durability focus of the Bell MX-9 Adventure Protint Visor Photochromic, built to shrug off dust and vibration that a road-only shield isn’t engineered for.
How to Choose a Replacement Photochromic Visor
- Confirm your exact helmet model and visor mechanism first. Photochromic shields are rarely universal, so cross-check the manufacturer’s fitment list before anything else.
- Decide whether you want a full shield or an insert. A full replacement photochromic visor gives deeper tint range; an insert like Pinlock’s ProtecTINT is cheaper and reversible.
- Check Pinlock-readiness if you ride in variable UK weather. Fog resistance and photochromic tint aren’t the same feature, and combining both matters more here than in drier climates.
- Weigh transition speed against budget. Premium shields generally react faster and more evenly, based on aggregated review sentiment, though the gap has narrowed in recent product generations.
- Consider your typical riding light conditions. Tree-lined commutes, tunnels and dusk riding all stress a photochromic visor differently than steady motorway daylight.
- Verify UK/ECE approval markings before buying. A visor without an approved marking isn’t legal to ride with, regardless of how well it performs optically.
- Factor in the mechanism and screws, not just the shield. A worn mechanism undermines even the best replacement photochromic visor, as covered above.
Photochromic Visor Fitment Guide: Universal Sizing Explained
There’s no such thing as a genuinely one-size-fits-all photochromic visor, and any listing claiming total universal fitment deserves a sceptical eyebrow. What manufacturers actually mean by “universal” fitment, in the honest sense, is that one shield design is engineered to fit a family of related helmet shells — the Lazer Lumino Active Photochromic Visor, for instance, spans four different Lazer models because those shells share a common shell geometry and mounting pattern, not because the visor magically adapts to anything.
For universal photochromic visor sizing, the practical approach is straightforward: always match by helmet model and, where relevant, shell size (small shell vs large shell variants exist on several premium helmets and take differently sized visors). Insert-based options like the Pinlock ProtecTINT achieve something closer to genuine flexibility because they’re sized to fit inside an existing Pinlock-ready visor rather than the helmet shell directly — this is why Pinlock offers dozens of DKS part codes rather than one universal insert.
A proper photochromic visor fitment guide always starts with your helmet’s model number, printed inside the chin strap or on the box, cross-referenced against the manufacturer’s official compatibility chart rather than a generic “fits most helmets” claim on a third-party retailer’s listing.
Common Mistakes When Buying a Replacement Photochromic Visor
The single most common mistake is ordering by helmet brand alone rather than exact model and shell size — an error that costs riders a return shipping fee and a week without their preferred visor. A close second is assuming photochromic automatically means road-legal; it generally is, since most reach a minimum VLT threshold in daylight, but riders should still verify markings rather than assume.
Another frequent slip-up: expecting a photochromic shield to fully replace a proper dark visor for genuinely intense summer glare. Reviewers across the shortlist above consistently note photochromic shields max out lighter than a dedicated dark tint, which is by design — they’re built for adaptability across a ride, not maximum darkness at any one moment. Buyers occasionally overlook checking Pinlock-readiness too, then discover their beloved anti-fog insert doesn’t fit the new shield.
Photochromic vs Standard Tinted Visors
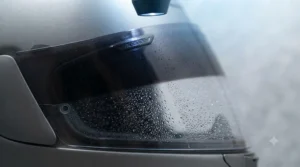
A fixed tinted visor is simple, cheap and predictable, but it’s a compromise struck once at the factory rather than adjusted to your actual ride. A photochromic visor, by contrast, negotiates that compromise continuously, which is where the real value shows up on longer or more varied rides.
| Factor | Photochromic Visor | Standard Tinted Visor |
|---|---|---|
| Adapts through the ride | Yes, automatically | No, fixed shade |
| Legal for night riding | Generally yes (clears in low light) | Often restricted after dark |
| Upfront cost | Higher | Lower |
| Best for | Mixed/variable light riders | Consistently sunny climates |
Looking at the comparison above, a standard tinted visor still makes sense for riders in reliably bright, dry regions who rarely ride after dusk — there’s less to gain from adaptability when conditions barely change. For the UK’s genuinely unpredictable weather, though, a photochromic option removes the need to carry a spare clear shield “just in case,” which is precisely the practical value most reviewers cite.
Helmet Visor Replacement: UK Safety, Regulations & Compliance
Any helmet visor replacement fitted for road use in Great Britain must carry proper approval markings. Official guidance sets out that every helmet worn on UK roads needs to meet British Standard BS 6658:1985 and carry the BSI Kitemark, or comply with UNECE Regulation 22.05, 22.06, or an equivalent EEA standard, and the same approval requirement applies to the visor or goggles fitted to that helmet, not just the shell itself.
On tint specifically, the picture is genuinely nuanced rather than black-and-white. UK guidance broadly treats visors allowing 80% or more light through as legal at all times, while visors between roughly 50-80% are treated as daytime-use-only, and anything below that threshold isn’t considered road-legal regardless of marketing claims. Photochromic visors are designed to clear substantially in low light specifically to stay within these bounds automatically — arguably their biggest safety advantage over a fixed dark tint that a rider might forget to swap out before a night ride. For the full official position, gov.uk’s motorcycle helmet law guidance is worth reading directly rather than relying on secondhand summaries.
It’s also worth checking a helmet’s independent safety rating alongside visor choice — the UK’s SHARP scheme rates impact performance separately from visor optics, and a strong-rated shell paired with a well-matched photochromic visor is a genuinely sound combination for year-round riding.
Long-Term Cost & Maintenance
A replacement photochromic visor isn’t a one-and-done purchase in the way some riders assume. Photochromic coatings gradually lose responsiveness with UV exposure over years, not months, but heavy year-round commuters may notice a slower, shallower transition after two to three seasons of hard use. Factor a replacement roughly every few years into the total cost of ownership rather than treating the visor as a lifetime part.
Scratches matter more here than on a clear shield too — a scuffed photochromic coating scatters light unevenly, which can make the tint transition look patchy rather than smooth. Storing the helmet in a proper bag rather than loose in a pannier, and cleaning with a genuinely soft microfibre cloth, extends the useful life noticeably according to aggregated maintenance advice across the brands covered here. Budget shields like the HJC HJ-33 Photochromic Visor typically need replacing sooner than premium options such as the Shoei CWR-F2PN Photochromic, which somewhat narrows the real-terms cost gap between them over a three-to-five-year ownership window.
Frequently Asked Questions
❓ What is a photochromic visor and how does it work?
❓ Are photochromic visors legal for UK roads?
❓ Will a replacement photochromic visor fit any helmet?
❓ How long do photochromic visors last?
❓ Can I fit a photochromic visor myself at home?
Conclusion
A good replacement photochromic visor genuinely changes how a ride feels — less squinting, less fumbling for sunglasses, less arriving at your destination with eyes like you’ve stared down a welding torch. Across this shortlist, the Shoei CWR-F2PN Photochromic and Shark Aeron Photochromic Visor Iridium Dark Smoke lead on premium performance, the Bell Panovision Visor Protint Photochromic and Bell MX-9 Adventure Protint Visor Photochromic offer a genuinely solid mid-range balance for street and adventure riding respectively, and the HJC HJ-33 Photochromic Visor alongside the Pinlock ProtecTINT insert prove you don’t need a premium budget to try the technology.
What matters most, based on everything covered here, is matching the visor to your actual helmet model and your actual riding conditions rather than chasing whichever option looks flashiest online. Check fitment carefully, don’t skip the mechanism and screw-kit check, and verify approval markings before you ride. Do that, and whichever shield from this list you land on should serve you well through every shift in British weather.
Recommended for You
- Transitions Visor for Motorbike Helmet: 7 Top UK Picks (2026)
- Mirrored Visor for Motorcycle Helmet: 7 Best UK Picks (2026)
- Mirror Visor for Track Riding: 7 Best Picks for 2026 (Glare-Proof)
Disclaimer: This article contains affiliate links. As an Amazon Associate, I earn from qualifying purchases. If you purchase products through these links, we may earn a small commission at no additional cost to you.
✨ Found this helpful? Share it with your friends! 💬🤗
