In This Article
A pinlock insert fitting kit is the set of parts that turns a single-layer visor into a fog-resistant double screen. It covers the anti-fog insert itself, the pins (posts) that hold it in place, and the simple tools used to seat, tension and clean it. Match those parts properly and your visor stays clear.
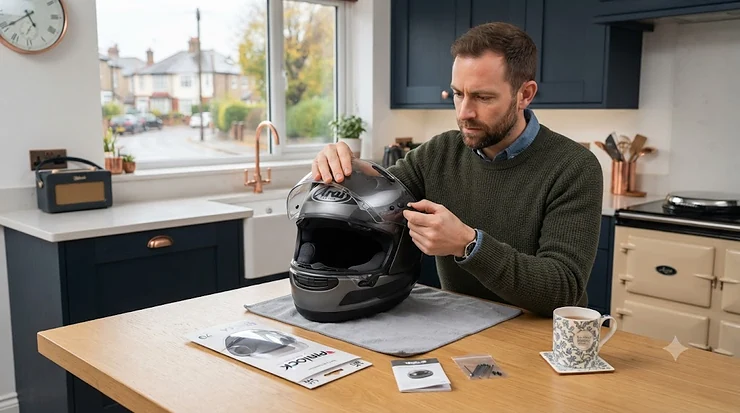
Here’s the thing most riders learn the damp way. A British October commute doesn’t care how much your helmet cost. Breath meets cold visor, condensation blooms, and suddenly you’re peering through a bathroom mirror at 50 mph. 🌫️
The fix is a clever bit of physics. A moisture-absorbing lens sits behind your visor, sealed by a silicone bead, trapping a thin pocket of air. It works brilliantly, but only if the insert, the pins and the fit all agree with each other. That’s where a proper pinlock insert fitting kit earns its place in your garage drawer.
This guide pulls together real product data, real installation guidance and honest analysis. It won’t pretend to be a hands-on test. For a sense of how routine the job is, MCN’s guide to fitting a Pinlock visor insert walks through the basics. We’ll go further: seven real options, a full pinlock fitting instructions walkthrough, pinlock pin posts explained, and the tools that keep everything sealed. Prices below are indicative ranges only, so always check current price and compatibility before buying.
Quick Comparison Table: Pinlock Insert Fitting Kit Options at a Glance
| Product | Lens / Part Type | Fit Approach | Indicative Price Range | Best For |
|---|---|---|---|---|
| HJC Pinlock 120 MaxVision Clear | Pinlock 120 lens | Made for HJC HJ-42 Pinlock-ready visors | £20-£35 | HJC owners wanting an easy match |
| Arai SAI MaxVision Pinlock 120 Clear (DKS095) | Pinlock 120 lens | Made for Arai SAI IC MAX-V shields | £25-£40 | Arai riders wanting a model-specific fit |
| Shark VZ120 Pinlock Clear Max Vision | Pinlock 120 lens | Shark-specific insert | £25-£35 | Shark riders replacing a worn insert |
| Pinlock Replacement Pins | Pin hardware | Replaces tired or missing posts | Under £15 | Fixing loose or lost pins |
| Pinlock 70 MaxVision | Pinlock 70 lens | Visor-specific, check code | £15-£30 | Budget-conscious commuters |
| Pinlock 200 | Pinlock 200 lens | Visor-specific, check code | £35-£55 | Track days and heavy fogging |
| Pinlock PrecisionTone | Photochromic lens | Visor-specific, check code | £40-£65 | All-weather touring |
Looking at the table, the HJC Pinlock 120 MaxVision Clear, Arai SAI MaxVision Pinlock 120 and Shark VZ120 Pinlock Clear Max Vision are brand-matched options, so the value lies in guaranteed shape compatibility. The Pinlock 70 MaxVision is the cheapest way into fog-free riding, while the Pinlock 200 and Pinlock PrecisionTone cost more because they target harder conditions. Pinlock Replacement Pins sit apart, because they fix the hardware rather than the lens.
💬 Just one click — help others make better buying decisions too!😊
Top 7 Pinlock Insert Fitting Kit Options: Expert Analysis
1. HJC Pinlock 120 MaxVision Clear — made-to-measure for HJC HJ-42 visors
The standout is precision of fit. This clear lens is listed for genuine HJC HJ-42 Pinlock-ready visors, including the RPHA 12 fitment, so the outline should sit inside the pins without improvisation.
The lens carries the Pinlock 120 MaxVision rating, aimed at wet, cold and humid riding with the visor fully closed. In practice, that means you can leave the visor down at traffic lights in November instead of cracking it open and letting the rain in.
Here’s what to weigh: the listing stresses compatibility with genuine HJC HJ-42 visors only. Aftermarket or older visors may not match. If your helmet is anything other than that generation, stop and check the visor code.
I couldn’t verify a large pool of aggregated reviews for this exact listing at the time of research, so treat the general Pinlock fitting feedback as your guide: inserts are soft and scratch easily, so gentle handling matters.
Pros:
- ✅ Designed around HJC HJ-42 visor geometry
- ✅ Pinlock 120 rating for wet and cold rides
- ✅ Clear lens suits everyday road use
Cons:
- ❌ Useless on non-matching visors
- ❌ Soft surface scratches if mishandled
Price range: roughly £20-£35, so decent value if it matches your visor. Check current price.
2. Arai SAI MaxVision Pinlock 120 Clear (DKS095) — the model-coded fit for Arai riders
The hook here is the code. Pinlock product code DKS095 identifies this clear lens for SAI IC MAX-V shields, and that specificity is exactly what you want when shape errors cause gaps.
Retail listings link this insert to several Arai models, such as the RX-7 GP and Quantum ST. On paper, the Pinlock 120 MaxVision design means a reliable seal and fog resistance in demanding weather. Arai also uses its own pin system, and Pinlock’s support page notes Arai is among the brands making its own pins. That matters if you’re tempted to swap posts: use Arai-correct hardware.
Based on the specification, this is for the rider who wants zero guesswork. Match the DKS number to your shield, confirm the helmet generation, and you’re most of the way there. The spec sheet won’t tell you this, but a wrong-shape insert is the classic cause of the middle-of-the-visor fog patch that frustrates riders.
Verified review data for this specific listing was thin at the time of research, so I won’t invent any.
Pros:
- ✅ DKS095 code makes matching straightforward
- ✅ Pinlock 120 MaxVision performance rating
- ✅ Built for Arai’s own pin system
Cons:
- ❌ Only fits specific Arai shield types
- ❌ Premium-brand pricing versus generic lenses
Price range: around £25-£40. Reasonable if your Arai shield needs it. Check current price.
3. Shark VZ120 Pinlock Clear Max Vision — clear Max Vision lens for Shark helmets
The headline is simplicity: a clear Max Vision lens coded VZ120 for Shark visors, from a UK retailer offering free delivery on the listing.
A real customer review on that listing is worth reporting honestly. One buyer warned that the plastic is soft and that if the lens isn’t fully seated under the pin, it’s easy to mash it. In this reviewer’s view, a small amount of damage makes it useless. The retailer replied that the insert can be removed and moved to another visor, and told buyers to follow the fitting instructions supplied.
Here’s what to weigh: both comments are valid. The material is delicate, but the job is simple if you take your time. This is why a proper fitting routine, which we cover below, matters more than the price.
Analysis says this suits Shark owners replacing a fogged, scratched or lost lens. Confirm the VZ120 code against your visor before ordering.
Pros:
- ✅ Clear lens suits all-year commuting
- ✅ Transferable between compatible visors
- ✅ Free UK delivery on the retailer listing
Cons:
- ❌ Soft plastic damages if seated carelessly
- ❌ Shark-specific, so no universal fit
Price range: roughly £25-£35. Check current price.
4. Pinlock Replacement Pins — the hardware fix for loose or missing posts
This is the odd one out, and arguably the most useful. Pinlock pin posts are the small anchors on the visor’s inner surface, and when they wear or crack, no lens will ever seal properly.
Pinlock’s own support information describes several pin families: one-component, two-component, three-component and tear-off. Adjustment differs for each. One-component pins are pushed out and turned by hand in steps of no more than 45°. Two-component pins can be adjusted with a flathead screwdriver or bank card. Three-component and tear-off pins use a 5 mm hex tool.
One real caveat: the support page says SHOEI, Arai, HJC, LS2, SCHUBERTH and Nolan use their own pins. If you ride one of those, generic replacements may not be the right answer. Check helmet-specific parts first.
Analysis: this is visor pin fitting hardware for riders comfortable with a small DIY job. I found no reliable aggregated reviews to summarise, so I’ll simply say what the guidance shows: correct pin position is the difference between a seal and a leak.
Pros:
- ✅ Cheap fix for worn or missing pins
- ✅ Restores correct lens tension
- ✅ Several pin designs across the range
Cons:
- ❌ Not compatible with brands using own pins
- ❌ Wrong type won’t hold the insert
Price range: typically under £15. Check current price.
5. Pinlock 70 MaxVision — the budget way into fog-free riding
The hook is entry-level reliability. Pinlock describes the 70 MaxVision as its consistent, dependable anti-fog lens design with a clear field of view.
For a rider commuting a few miles in average UK weather, that’s usually enough. Think of the Pinlock 70 as a solid all-rounder rather than a specialist. It won’t match the top-tier lenses in the harshest cold-and-wet combinations, but it isn’t meant to.
Here’s what to weigh: compatibility depends on the visor, not the helmet brand alone. A retailer page for Pinlock inserts says to check the visor code, helmet model and generation before ordering. Don’t skip this. A budget lens that doesn’t fit isn’t a bargain.
This is for budget-conscious commuters, learners, and anyone fitting a second visor. I couldn’t verify a solid review pool for this exact line, so there’s no invented sentiment here.
Pros:
- ✅ Lowest-cost route to a Pinlock lens
- ✅ Same fitting method as premium lenses
- ✅ Fine for everyday commuting
Cons:
- ❌ Lower rating than 120 or 200 lenses
- ❌ Visor code must match exactly
Price range: about £15-£30. Good value for light use. Check current price.

6. Pinlock 200 — track-tested for the heaviest fogging
Its standout claim is pedigree: Pinlock states the 200 lens has been tested in MotoGP, and markets it for the most demanding weather.
For everyday road riders, that translates to headroom. If you ride hard, wear a full-face helmet in cold rain, or breathe heavily into your visor (sports riding, filtering in the wet), the higher-rated lens gives you more margin before condensation returns.
What most buyers overlook is that a better lens can’t rescue a poor fit. The same pins, the same seal, the same paper-gap check apply. Spending more on the Pinlock 200 while ignoring the pin tension is like buying performance tyres and never checking the pressure.
Best for track-day riders, sports tourers and anyone who has outgrown lower-rated lenses. Verified aggregated reviews weren’t available to summarise, so I’m relying on the manufacturer’s positioning and general fitting guidance.
Pros:
- ✅ Highest anti-fog rating in the range
- ✅ Suited to demanding, high-effort riding
- ✅ Racing-derived design pedigree
Cons:
- ❌ Costs more than 70 or 120 lenses
- ❌ Overkill for short, mild commutes
Price range: roughly £35-£55. Worth it for hard riders. Check current price.
7. Pinlock PrecisionTone — a lens that adapts to changing light
The hook is the colour-changing trick: Pinlock says these anti-fog lenses shift tone with light intensity, so a single insert handles varying weather.
That’s genuinely useful on a long UK day, where bright low sun gives way to cloud and drizzle within an hour. Instead of swapping visors, the lens adjusts. It’s one of the more interesting options for touring riders.
Here’s the caveat you need to weigh. UK rules on tinted eye protection are strict, and a retailer page advises checking specification and UK road-use requirements before riding with a tinted insert. The Highway Code advises against tinted visors at night, so consider how the lens behaves in low light before relying on it after dark.
Best for all-weather tourers who value convenience. I found no verifiable aggregated review data for it, so treat this as spec-based analysis only.
Pros:
- ✅ One lens covers varied light conditions
- ✅ Reduces visor swapping on long trips
- ✅ Still delivers anti-fog protection
Cons:
- ❌ Highest cost of the seven options
- ❌ Tint concerns for night riding
Price range: around £40-£65. Premium, so best for regular tourers. Check current price.
Pinlock Fitting Instructions: A Step-by-Step Guide
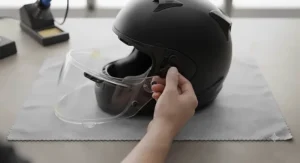
Let’s be clear: pinlock fitting instructions are refreshingly short, and Pinlock’s official lens installation manual confirms the flow. Here’s the routine, expanded with the practical detail that instructions leave out. 🔧
- Remove the visor from the helmet, following your manufacturer’s method.
- Check the pins. The arrows on the pins should point outwards before you begin.
- Clean the visor interior gently. Mild liquid soap and lukewarm water, a soft cloth, no abrasives.
- Peel the protective film from the lens, and avoid touching the surface.
- Flex the visor slightly and drop the lens between the two pins. The silicone bead sits against the visor.
- Seat both ends so neither corner is stretched. If the lens bows outward, straighten the visor and press the middle gently.
- Check the seal. Slide the corner of thin card or paper around the edge. Any gap means the tension needs work.
- Refit the visor and check you can read the logo from the outside.
Analysis: the paper-gap test is the step riders skip, and it’s the one that stops rain creeping in. As one guide from Sportsbikeshop notes, water that gets past your seal will find the smallest gap between lens and visor.
If you’re using a pinlock insert installation kit that includes a hex tool or card, keep it with the helmet. Doing this once takes ten minutes. Doing it wrong twice can wreck the insert.
Real-World Scenarios: Matching a Pinlock Insert Fitting Kit to Your Riding
Here are three rider profiles, with reasoning based on the spec comparison.
The 8-mile commuter in Leeds. Rides year-round, mostly urban, cold mornings. A Pinlock 70 MaxVision or brand-matched 120 lens is a sensible fit. Budget is modest, use is daily, and a spare lens costs little. If the visor code matches an HJC Pinlock 120 MaxVision Clear, the extra rating is cheap insurance.
The weekend sports rider. Rides hard on chilly B-roads, breathes heavily, wants clear vision at pace. Here the Pinlock 200 justifies its cost, and a set of spare Pinlock Replacement Pins kept in the toolbox makes sense for track-day changes. Verify pin compatibility first.
The long-distance tourer. Rides through mixed light and weather for hours. The Pinlock PrecisionTone is appealing, though only if the tint suits your riding hours. Otherwise a clear Arai SAI MaxVision 120 or Shark VZ120 Pinlock Clear Max Vision stays simpler and legal for any light.
The pattern: match the lens rating to how often and how hard you’ll fog the visor, then match the visor code, then check the pins. Budget, environment and frequency of use all matter.
Problem and Solution Guide: Fixing Common Pinlock Headaches
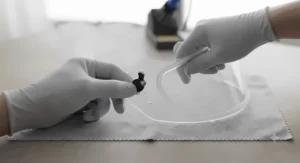
Problem 1: Fog appears across the middle of the visor. Likely causes: the lens isn’t fully seated, the pins are off-centre, or the lens is the wrong shape. Refit, check the seal in natural light, and confirm the visor code.
Problem 2: The lens feels loose. Over time the lens may shrink, and Pinlock’s support guidance says to remove the lens and turn the pin indicator by up to 45° towards the helmet to add tension. Refit and re-check the seal. Repeat in small steps.
Problem 3: Rain sneaks between lens and visor. Usually a seal gap. Use the card test around the whole edge. Check the visor’s own seal on the helmet too.
Problem 4: Scratches on the lens. Pinlock warns that inserts scratch more easily than visors. Clean only with mild soap, lukewarm water and a soft moist cloth, and let both parts dry naturally.
Problem 5: A pin has cracked or gone missing. Order Pinlock Replacement Pins if your brand uses Pinlock-made posts. If not, source manufacturer-specific parts.
Cross-reference: the visor maintenance tools section below covers the small kit that prevents most of these.
What Is a Pinlock Insert Installation Kit? (And What Should Be in It)
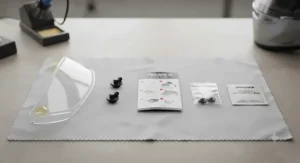
A pinlock insert installation kit is the bundle of items needed to fit or refit an anti-fog lens: a compatible insert, correctly matched pins, and basic tools such as a hex key, thin card, and a soft cloth. It’s not a single official product, more a working combination.
Why does that matter? Because helmets are sold in different states. On one retailer’s listings, “Pinlock Ready” means you need to buy an insert, while “Pinlock Included” means one is in the box. Not every helmet with pins comes with a lens, so don’t assume.
A sensible kit contains:
- The lens, matched to your visor code.
- Spare pins, if your brand uses Pinlock-made ones.
- A 5 mm hex tool, useful for screw-type adjustments.
- A bank card or thin card, for the two-component pin and the seal test.
- Soft cloth and mild soap, for cleaning.
Analysis: most fitting failures come from mismatched parts, not clumsy hands. Buy the set as a system.
How to Choose a Pinlock Insert Fitting Kit: 6 Steps
- Identify your visor code. Compatibility depends on the visor, not just the helmet brand. The code and generation matter more than the helmet name.
- Confirm your pin type. One-component, two-component, three-component and tear-off pins each adjust differently.
- Pick a lens rating. The 70 suits light use, the 120 suits most weather, the 200 targets the harshest conditions.
- Decide on clear or tinted. Clear is the safe all-rounder. Tints need a UK legal check.
- Check what’s in the box. “Ready” and “Included” are very different things when buying a helmet.
- Budget for a spare. A second lens or set of pins costs little compared with a fogged ride.
Here’s what to weigh: don’t overbuy. A Pinlock 200 on a short commute is like a sports car in a car park. But don’t underbuy either. A Pinlock 70 MaxVision on a hard-riding, cold-weather machine may leave you chasing visibility.
Understanding Pinlock Pin Posts: Which Type Does Your Visor Have?
Pinlock pin posts are the small anchors on the visor’s inner surface that hold the lens. They’re eccentric, meaning the axis isn’t dead centre, so turning them changes lens tension. Pinlock’s support FAQ explains each variant.
| Pin Type | How You Adjust | Typical Use | Best For |
|---|---|---|---|
| One-component | Push out, turn by hand, push back | Everyday road visors | Simple hand adjustment |
| Two-component | Flathead screwdriver or bank card | Mixed road use | Riders with basic tools |
| Three-component | 5 mm hex tool on inside hexagon | Screw-adjustable systems | Fine tension control |
| Tear-off pin | 5 mm hex tool | Racing-oriented visors | Track riders |
The table shows a clear split: one and two-component pins are tool-light and forgiving, while three-component and tear-off pins give precise control for those willing to use a hex key. Whichever you have, adjust in small steps (never more than 45° at a time) and always remove the lens first. Where your helmet brand makes its own pins, buy those, and treat generic Pinlock Replacement Pins as suitable only when the fit is confirmed.
Common Mistakes When Buying a Pinlock Insert Fitting Kit
Buying by helmet brand alone. The visor code and generation are what count. Two visors from the same maker can differ.
Ignoring what’s included. A helmet marked “Pinlock Ready” doesn’t ship with a lens. Budget for it.
Assuming all pins are interchangeable. Several major brands use their own pins, so a generic set can be the wrong answer.
Overpaying for rating you don’t need. A Pinlock 200 on a five-minute ride is money wasted.
Choosing a tint without checking UK rules. Retail guidance says to check UK road-use requirements before riding with a tinted insert.
Rushing the fit. As the Shark reviewer noted, a poorly seated soft lens can be ruined. The retailer’s reply, that it can be removed and refitted, shows patience pays.
Analysis: almost every mistake here is a compatibility mistake. Spend the first five minutes on codes and pin types and the rest gets easy.
Visor Maintenance Tools: The Small Kit That Protects Your Pinlock
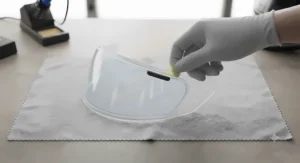
Visor maintenance tools are cheap, small and easy to forget. Together they keep the seal intact and the lens scratch-free. 🧰
- Microfibre cloth. Soft and non-abrasive, because the lens scratches more easily than the visor itself.
- Mild liquid soap and lukewarm water. No harsh solvents.
- 5 mm hex key. For three-component and tear-off pins.
- Bank card or thin card. For two-component adjustment and the edge gap test.
- Bullnose pliers. One retailer’s technicians use them to pop simple friction pins in or out with just enough force.
- A soft storage pouch. For a spare lens.
Cleaning routine: remove the lens, wash lens and visor separately, air dry, refit. Never wipe the lens dry with a rough cloth. When you’re removing it, flex the visor until tension drops and lift the lens out carefully without touching the surface. Ten minutes a month keeps a Shark VZ120 Pinlock Clear Max Vision or an Arai SAI MaxVision 120 working like new.
Long-Term Cost and Maintenance: Is a Pinlock Worth It?
Total cost of ownership is where inserts quietly win. A lens is a small purchase compared with the alternatives: repeated visor swaps, anti-fog products that need constant reapplication, or riding with the visor cracked open in the rain.
| Option | Upfront Cost | Ongoing Effort | Best For |
|---|---|---|---|
| Pinlock 70 MaxVision | Low | Occasional cleaning | Everyday commuters |
| HJC Pinlock 120 MaxVision Clear | Low-mid | Occasional cleaning | Wet-weather all-rounders |
| Pinlock 200 | Mid-high | Careful cleaning | Hard sports riding |
| Pinlock Replacement Pins | Very low | Rare | Restoring a tired setup |
The value pattern: spend a little more once on a lens that matches your conditions, and the per-ride cost becomes tiny over several seasons. The Pinlock 200 costs more up front but only pays back if you genuinely need the extra margin. Meanwhile, replacing worn pins for under £15 can rescue a lens you already own. Lenses can shrink with age, so plan on re-tensioning, and replace any lens that is scratched or has lost its seal.
Safety, Regulations and Compliance Guide
Your helmet and visor must meet UK requirements, and an anti-fog lens shouldn’t compromise them. Under UK guidance, helmets must meet a recognised standard, and eye protection must meet a British Standard or an equivalent European mark. SHARP’s explainer on ECE R22-06 sets out why that matters.
Key points:
- ECE 22.06 is the current standard, though ECE 22.05 helmets remain legal in the UK.
- ECE 22.06 testing looks at how accessories affect helmet and visor performance, so a lens must be compatible with your visor.
- Tinted lenses need extra thought. The Highway Code advises against tinted visors at night.
- Pinlock’s manual warns that an insecure lens can come loose and impair vision, which is a safety issue, not just an annoyance.
Practical takeaway: use lenses made for your visor, keep the pins secure, and check the seal before every long ride. If the insert or pins look damaged, replace them. Clear vision is part of your protective kit.
DIY Visor Fitting vs Other Anti-Fog Methods
DIY visor fitting is the practical heart of this topic. You don’t need a workshop, only patience and the right parts. But how does it stack up against alternatives?
| Method | Effectiveness | Effort | Best For |
|---|---|---|---|
| Pinlock 120 lens (for example HJC Pinlock 120 MaxVision Clear) | Strong, sealed system | One-off fit | Year-round riders |
| Pinlock 70 MaxVision | Good for moderate conditions | One-off fit | Budget riders |
| Anti-fog sprays and coatings | Temporary | Frequent reapplication | Emergency fixes |
| Cracking the visor open | Instant but limited | Constant | Slow riding only |
The written comparison is simple. Sprays and cracked visors are stopgaps that need repeating, while a fitted lens works passively every ride. The history is telling too: riders tried soap suds and even potatoes before the double-shield idea arrived. For anyone doing their own DIY visor fitting, the pinlock fitting instructions above take minutes, and the payoff lasts seasons. The trade-off is fit: a lens must match the visor.
FAQ
❓ Can I fit a pinlock insert fitting kit without special tools?
❓ Will a pinlock insert installation kit fit any helmet visor?
❓ How do I know if my visor has pinlock pin posts?
❓ Why is my pinlock insert loose after a year?
❓ Is a tinted pinlock insert legal on UK roads?
Conclusion
The best pinlock insert fitting kit isn’t the most expensive one. It’s the one whose lens, pins and tools all agree with your visor. Start with the visor code, confirm your pin type, pick a rating that matches how hard you ride, then fit it slowly and check the seal with a bit of card.
For everyday riders, a brand-matched 120 lens such as the HJC Pinlock 120 MaxVision Clear, the Arai SAI MaxVision Pinlock 120 Clear (DKS095) or the Shark VZ120 Pinlock Clear Max Vision is the sensible centre of the market. The Pinlock 70 MaxVision keeps costs down. The Pinlock 200 rewards hard riders, and the Pinlock PrecisionTone suits tourers who accept the tint trade-offs. When the problem is a worn post, Pinlock Replacement Pins fix the root cause cheaply, provided your brand doesn’t use its own.
Keep the visor maintenance tools together, re-check tension every few months, and respect UK rules on tints and standards. Do that and the only mist you’ll see is on the moors.
✨ Don’t Miss Out on Clear Vision!
🔍 Take your riding to the next level with these carefully selected lenses and pins. Click on any highlighted item to check current pricing and availability, and get a fog-free winter ahead of you! 🏍️🌧️
Recommended for You
- Photochromic Motorcycle Visor: 7 Best Picks For UK Riders (2026)
- Universal Pinlock Insert For Helmets: 7 Fog-Free Picks (2026)
- Pinlock 70 Insert For Motorcycle Visor: 7 Best Anti-Fog Visor Picks (2026)
Disclaimer: This article contains affiliate links. As an Amazon Associate, I earn from qualifying purchases. If you purchase products through these links, we may earn a small commission at no additional cost to you.
✨ Found this helpful? Share it with your friends! 💬🤗
