In This Article
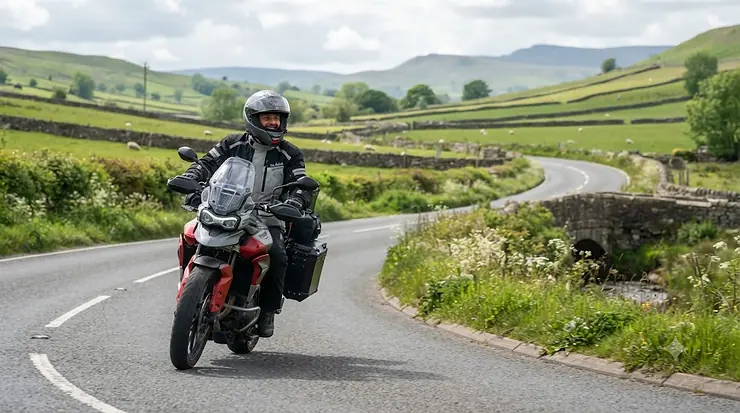
Anyone who has ridden from a shaded, drizzly A-road into a sudden blast of low autumn sun knows the problem in half a second: your visor is either too dark or not dark enough, and there’s no time to stop and swap shields on a fast-moving dual carriageway. That’s the exact gap a photochromic visor for touring riders is built to close. In simple terms, it’s a helmet visor whose tint reacts automatically to UV light — clear in the shade or after dark, progressively darker as the sun comes out — so you’re not fumbling for sunglasses or pulling over every time the weather flips its mood, which in Britain can happen three times before lunch.

For touring riders specifically, this matters more than it does for a five-minute commute. A 200-mile day might take you through dappled forest canopy, motorway glare, a tunnel, and a drizzly moorland descent, all before tea time. Carrying a spare tinted shield in a tank bag is one workaround; a self-adjusting lens is the other, and it’s the one that doesn’t require you to stop the bike. Under UK law, visors also have to meet specific optical and light-transmission standards — worth knowing before you buy, and something we’ll come back to later in this guide, with the full detail sourced from gov.uk’s official guidance on motorcycle helmets, visors and goggles.
Below, we’ve dug into seven real, currently available options — from full factory-fit shields by Shoei and Bell to budget-friendly photochromic films you can fit to an existing visor in ten minutes. Every product here is assessed on genuine specifications and aggregated review sentiment, not marketing copy, so you can work out which one actually suits the way you ride rather than the way a listing photo makes it look.
Quick Comparison: The Best Photochromic Visor for Touring Riders at a Glance
If you’re short on time, this table gives you the headline picture before you dive into the full breakdown further down the page.
| Visor | Type | Price Range | Best For |
|---|---|---|---|
| Shoei CWR-1 | OEM full shield | £140-£180 range | Premium touring helmets, long motorway stints |
| Bell Transitions SOLFX | OEM full shield | £90-£120 range | Budget-to-mid touring helmets, factory-fit convenience |
| Pinlock ProtecTINT | Anti-fog insert | £25-£40 range | Riders who already own a clear visor and hate fogging |
| Aftermarket HJC-fit photochromic shield | Aftermarket full shield | £20-£30 range | RPHA-series owners on a tight budget |
| WeePro photochromic film | Peel-and-stick film | under £15 | Trying photochromic tech without committing |
| Systercol photochromic film | Peel-and-stick film | under £12 | Ultra-budget experimenting, spare helmets |
| PSLER photochromic shield | Aftermarket full shield | £20-£30 range | Bell Qualifier/Vortex owners wanting an OEM alternative |
Looking at the spread above, the split really comes down to how much of the visor’s optical performance you’re willing to trade for price. The Shoei CWR-1 and Bell Transitions SOLFX sit at the top because they’re engineered as complete, tested shields rather than add-ons, which matters when you’re doing 300 miles in a day and can’t afford distortion. Budget buyers shouldn’t dismiss the film options outright, though — WeePro and Systercol let you sample the technology for the price of a tank of petrol before committing to a full shield.
💬 Just one click — help others make better buying decisions too!😊
Top 7 Photochromic Visors for Touring Riders: Expert Analysis
We’ve deliberately spread this list across budget, mid-range and premium price points, plus a mix of full OEM shields, aftermarket replacements, and film-based upgrades, because “best” depends heavily on what helmet you’re already wearing and how far you actually ride.
1. Shoei CWR-1 — best premium OEM photochromic shield
The Shoei CWR-1 is the shield that effectively started the modern conversation about photochromic touring visors, and it’s still the one most other manufacturers get compared against. It’s designed as a direct fit for the Shoei RF-1200, RF-SR, X-Fourteen, NXR, Spirit III and Ryd helmets, so this isn’t a universal bodge — it’s a proper OEM component. Shoei states the lens reaches roughly 50% light transmission within about two minutes of UV exposure and blocks over 99% of UV radiation, which in practice means the darkening happens fast enough that you rarely consciously notice the transition happening.
What most buyers overlook about this shield is the 3D injection-moulded construction, which keeps the field of view distortion-free right into your peripheral vision — cheaper photochromic shields often show slight warping at the edges, especially when banking into a corner. It’s also Pinlock-ready, so you can pair it with an anti-fog insert for cold-morning starts. Riders on long-term forums report it working “brilliantly” through several months of use, including in genuinely marginal UK weather, remaining fog-free with a pinlock fitted across a temperature range from around -3°C to 32°C.
Pros:
- ✅ Reaches around 50% tint in roughly two minutes
- ✅ Over 99% UV protection with distortion-free optics
- ✅ Genuine OEM fit for popular Shoei touring helmets
Cons:
- ❌ Only fits specific Shoei helmet models
- ❌ Noticeably pricier than aftermarket alternatives
In the £140-£180 range, this is a genuine investment rather than an impulse buy, but for riders already committed to a Shoei helmet doing serious touring miles, the value case is strong: one shield replaces the need to carry a spare tinted visor at all.
2. Bell Transitions SOLFX — best value factory-fit shield
The Bell Transitions SOLFX shield is what put photochromic technology within reach of riders who don’t want to spend Shoei money. It’s built for Bell’s ClickRelease system, fitting the Qualifier, Qualifier DLX, Vortex, RS-1, RS-2 and Revolver Evo helmets, plus older Star models made before 2016. Bell states the shield darkens from fully clear to a dark tint in around ten seconds in bright sunlight — noticeably quicker than some rivals — and blocks 100% of UV in both its clear and darkened states.
Here’s what the spec sheet won’t tell you outright: the tinting is temperature-sensitive, so the shield actually darkens more aggressively in cold weather than in heat, which is a genuinely useful quirk for UK touring where a chilly, bright spring morning is exactly when glare hits hardest. Aggregated owner feedback from rider forums is broadly positive but consistent on one point — the maximum tint doesn’t get as dark as a dedicated smoked visor, with some estimating it reaches roughly 60% of the darkness of a standalone tinted shield. For most riders that’s a fair trade for never having to carry a second visor.
Pros:
- ✅ Darkens fully in around ten seconds
- ✅ 100% UV blocking in both clear and tinted states
- ✅ Comes standard on some Bell helmets, cutting overall cost
Cons:
- ❌ Maximum tint is lighter than a dedicated dark shield
- ❌ Only compatible with specific ClickRelease Bell models
Priced in the £90-£120 range as a standalone accessory, this is arguably the strongest value pick on this list if you already own — or are considering — a compatible Bell helmet.
3. Pinlock ProtecTINT — best anti-fog and tint combined
Rather than replacing your entire visor, the Pinlock ProtecTINT is an insert that clips into any Pinlock-ready shield you already own, using the same twin-pin mounting most modern touring helmets already have fitted. It combines Pinlock’s established anti-fog technology — a moisture-absorbing surface plus an airtight seal that creates a thermal barrier — with a photochromic layer that lightens in low light and darkens as UV intensity rises.
The practical upshot is a two-in-one upgrade: you get fog resistance for cold, damp UK mornings and glare reduction for the afternoon sun, without buying a whole new shield. It’s a sensible option for riders who already like their current visor’s optics and don’t want to mess with that, but who are fed up with either fogging up at traffic lights or squinting on the motorway. Because it’s a widely used product across multiple helmet brands (Arai, HJC, AGV, Scorpion and others all list compatible versions), verified review data is scattered across brand-specific listings rather than one central product page — but the consistent theme across owner comments is that the anti-fog performance is reliable, while the tint change is more subtle than a full replacement shield.
Pros:
- ✅ Fits inside your existing Pinlock-ready visor
- ✅ Combines anti-fog performance with photochromic tint
- ✅ Available for a wide range of helmet brands and models
Cons:
- ❌ Tint effect is milder than a full photochromic shield
- ❌ Must be matched precisely to your visor’s Pinlock lens shape
At around the £25-£40 range depending on the specific fitment, it’s a genuinely affordable route into light-adaptive riding for anyone who isn’t ready to replace their whole visor.
4. Aftermarket HJC-fit photochromic shield — best budget RPHA replacement
For HJC RPHA 70 and RPHA 11 owners, aftermarket photochromic shields built for the HJ-26 fitment — such as the widely listed BSTOP replacement shield — offer a way into auto-tinting visors without OEM pricing. These are aftermarket parts, not official HJC components, and the listings are upfront about that, which is worth noting for anyone concerned about matching exact factory tolerances.
Based on the spec comparison with genuine HJC shields, the trade-off is fairly predictable: you get the clear-to-tint photochromic function and a proper mounting system designed to replicate the original shield’s fit and feel, at a fraction of the price of a factory Transitions-branded option — but optical clarity and long-term durability on aftermarket polycarbonate typically aren’t tested to the same standard as branded OEM parts. Reviewers shopping in this category consistently flag that fitment can vary slightly between batches, so it’s worth checking your specific helmet generation before ordering. For a rider who tours occasionally rather than constantly, and who wants to trial photochromic tech on an already-owned RPHA helmet, it’s a reasonable entry point.
Pros:
- ✅ Direct-fit replacement for popular HJC RPHA helmets
- ✅ Significantly cheaper than a factory Transitions shield
- ✅ Full clear-to-tint photochromic function included
Cons:
- ❌ Aftermarket build quality varies between batches
- ❌ No official HJC endorsement or warranty backing
In the £20-£30 range, this sits firmly in impulse-buy territory for existing RPHA owners curious about photochromic shields before committing to a pricier OEM option.
5. WeePro photochromic film — cheapest way to try photochromic tech
Instead of a shield, the WeePro photochromic film is a peel-and-stick anti-fog insert measuring 272 x 91mm that adheres to the inside of your existing flat visor. WeePro describes it as changing colour according to UV intensity — staying fully clear at night, turning light grey under cloud, and darkening further in direct sun — with a pin-less, adhesive-edge design that doesn’t require your visor to have Pinlock posts fitted.
What the spec sheet doesn’t fully convey is the limitation buried in the small print: it’s explicitly not suitable for curved visor shapes, which rules it out for a fair number of modern sports-touring helmets with heavily wrapped shields. For a flat or lightly curved visor, though, it’s a genuinely low-risk way to sample photochromic tinting before spending three figures on a full shield. Aggregated listing feedback describes the installation as straightforward with no glue residue on removal, though as with most film-based products, expect the effect to be more subtle and the anti-fog performance shorter-lived than a proper OEM Pinlock system.
Pros:
- ✅ Very low-cost entry into photochromic tinting
- ✅ No glue residue left behind on removal
- ✅ Doubles as an anti-fog layer
Cons:
- ❌ Not suitable for curved visor shapes
- ❌ Tint effect is subtler than a full shield replacement
At under £15, this is about as low-stakes as trying the technology gets, making it a sensible option before committing to something like the Shoei CWR-1 or Bell Transitions SOLFX.
6. Systercol photochromic film — lightest peel-and-stick option
Similar in concept to the WeePro option above, the Systercol photochromic film is a 27cm x 9cm self-tinting insert that Systercol describes as reacting to UV intensity: clear at night, slightly darker under cloud, and shifting toward a deeper tone in direct sunlight. It’s built with a hydrophobic coating intended to improve fog resistance and abrasion resistance alongside the tinting function, and installation follows the same peel-and-apply method as most film-based visor upgrades.
Here’s the honest read: at this price point you’re not getting anything close to the optical engineering of a factory Transitions shield, and the darkening is a genuinely subtle shift rather than a dramatic day-to-night change. Reviewers buying products in this category tend to describe them as “good for the price” rather than transformative, which is a fair characterisation — this is best understood as a low-commitment accessory rather than a serious touring upgrade. It’s a sensible pick for a spare helmet, a pillion’s lid, or simply confirming you like the concept of light-adaptive tinting before spending real money.
Pros:
- ✅ Very affordable universal fit
- ✅ Hydrophobic coating aids fog and scratch resistance
- ✅ Simple peel-and-stick installation
Cons:
- ❌ Tint change is subtle compared with OEM shields
- ❌ Limited long-term durability data available
At under £12, it’s genuinely one of the cheapest ways on this list to dip a toe into light adaptive visor for variable weather territory, provided your expectations stay realistic.
7. PSLER photochromic shield — best impact-resistant Bell replacement
Rounding out the list, the PSLER photochromic shield is an aftermarket replacement built specifically for the Bell Qualifier, Star, Vortex, RS-1 and Revolver range, positioned as a lower-cost alternative to Bell’s own Transitions SOLFX shield covered earlier. PSLER markets it as impact-resistant with UV400 protection, using the same photochromic principle of automatic tint adjustment based on light exposure.
The honest analytical take here is that this is a direct competitor to product #2 on this list rather than a different category of product — so the real decision is whether you want the OEM Bell Transitions shield’s tighter tolerances and factory testing, or a genuine cost saving from a third-party manufacturer targeting the same helmet fitment. Aggregated feedback on aftermarket shatterproof shields in this bracket typically notes solid impact resistance for the price but more variability in optical clarity than branded originals — a pattern that shows up consistently across third-party visor listings, not just this one. For riders who’ve already decided a full Bell-fit photochromic shield is the right call but want to keep costs down, it’s a legitimate option worth cross-shopping against the OEM version.
Pros:
- ✅ UV400 protection with impact-resistant construction
- ✅ Fits the same popular Bell helmet range as the OEM shield
- ✅ Meaningfully cheaper than the branded alternative
Cons:
- ❌ Optical clarity reported as more variable than OEM
- ❌ No official Bell warranty coverage
In the £20-£30 range, it’s a solid budget alternative for Bell owners who want photochromic convenience without the full OEM price tag.
At a Glance: Full Spec Comparison
| Visor | UV Protection | Darkening Speed | Fits |
|---|---|---|---|
| Shoei CWR-1 | 99%+ | ~2 minutes to 50% tint | Shoei RF-1200/RF-SR/X-Fourteen/NXR |
| Bell Transitions SOLFX | 100% | ~10 seconds to full tint | Bell Qualifier/Vortex/RS-1/RS-2/Revolver Evo |
| Pinlock ProtecTINT | Depends on host visor | Gradual, subtle | Most Pinlock-ready visors |
| Aftermarket HJC-fit shield | UV-rated (unverified independently) | Moderate | HJC RPHA 70/RPHA 11 (HJ-26 fitment) |
| WeePro film | UV-rated (unverified independently) | Gradual, subtle | Flat/lightly curved visors |
| Systercol film | UV-rated (unverified independently) | Gradual, subtle | Universal flat visors |
| PSLER shield | UV400 | Moderate to fast | Bell Qualifier/Star/Vortex/RS-1 |
The clearest pattern in this table is that darkening speed and verified UV data both track closely with price: the two OEM shields publish precise, third-party-testable figures, while the budget films and aftermarket options rely on manufacturer claims that aren’t independently verified. That doesn’t make the cheaper options bad value — it just means you should treat their tint performance as a genuine bonus on top of a low purchase price, rather than expecting shield-grade results.
Setting Up and Maintaining Your Photochromic Visor: A Practical Guide
Getting a photochromic visor onto your helmet correctly, and keeping it working well, makes a bigger difference to touring visor comfort than most riders expect. First, always fit the shield indoors under normal room lighting rather than in direct sun — photochromic lenses can already be mid-transition when you’re trying to align the pins, which makes it harder to judge the fit. Check that the mounting pins or Pinlock posts click home fully on both sides before you ride; a shield that isn’t seated can vibrate loose on rough B-roads.
For the first thirty days, avoid the common mistake of storing your helmet visor-down in direct sunlight on your bike seat or tank — prolonged heat exposure is the single biggest factor that shortens a photochromic coating’s working life, according to manufacturer guidance from Bell’s own product literature. Clean the shield only with lukewarm water and a microfibre cloth; household glass cleaners and anything containing ammonia can degrade the photochromic layer over time. If you’ve fitted a Pinlock insert alongside your photochromic shield, check the seal every few months, since a lifted edge lets moisture in and undoes the anti-fog benefit entirely. Riders touring through genuinely variable UK weather should also keep a lens-safe anti-fog spray in a pannier as a backup for the coldest mornings, when even a good Pinlock can be pushed to its limit.
✨ Don’t Miss These Exclusive Deals!
🔍 Take your touring visor comfort to the next level with these carefully selected products. Click on any highlighted item to check current pricing and availability. These tools will help you build a setup that keeps your eyes protected mile after mile!
Long-Distance Riding Gear: Real-World Scenarios for Touring Riders
Matching the right visor to the right rider matters more than any single spec on a page, so here are three realistic profiles built around genuine use cases for long-distance riding gear.
The weekend continental tourer, riding from Dover down through France on varied motorway and mountain roads, benefits most from a premium OEM shield like the Shoei CWR-1 or Bell Transitions SOLFX — long single-day distances mean maximum time in changing conditions, and the faster, more reliable darkening of a factory shield pays for itself in reduced eye strain over an eight-hour riding day. The budget-conscious commuter-turned-weekend-tourer, who rides to work most days but takes the bike touring three or four times a year, is better served by something like the Pinlock ProtecTINT or PSLER photochromic shield — a meaningful upgrade over a plain clear visor without the outlay of a full OEM shield they’ll only fully appreciate a handful of times annually. Finally, the curious first-timer who has never used a photochromic visor and wants to test the concept before investing properly should start with a film option like WeePro or Systercol, fitted to an existing spare visor, treating the low cost as the price of finding out whether the technology actually suits their riding style before upgrading further.
Problem → Solution: Fixing Common Photochromic Visor Frustrations
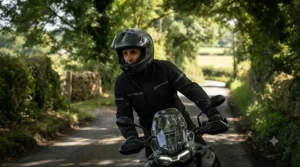
Even a well-chosen photochromic visor throws up a handful of recurring niggles on tour, so here’s how experienced riders typically solve them. The tunnel problem — where a shield stays dark for several seconds after you enter a tunnel because the photochromic reaction hasn’t caught up — is best managed by simply flipping the visor up an inch as you approach, letting your eyes adjust manually rather than riding blind through the entrance. The “not dark enough at midday” complaint, most common with budget films and inserts rather than full OEM shields, is usually solved by pairing the visor with polarised riding sunglasses worn underneath for the brightest hours, then removing them once the tint alone is sufficient. Fogging in cold weather, even with a photochromic shield fitted, is a Pinlock problem rather than a photochromic one — if your shield isn’t Pinlock-ready, a product like the Pinlock ProtecTINT solves both fogging and glare in one fitting.
Slow fade-back from dark to clear as dusk falls catches out riders who don’t realise the shield is still tinted until visibility already feels compromised — the fix is simply to flip the visor up as soon as you notice the light dropping, rather than waiting for the lens to catch up on its own. Finally, premature fading of the photochromic effect after a couple of seasons — a known limitation across this entire product category — is best avoided at the maintenance stage covered above: keep the shield out of direct sun when parked, and its working life will stretch considerably further than a shield left baking on a tank bag all summer.
How to Choose a Photochromic Visor for Touring Riders
Choosing the right option from a crowded market comes down to a handful of genuinely decisive factors, in roughly this order of importance for touring use:
- Check compatibility with your exact helmet model first. OEM shields like the Shoei CWR-1 and Bell Transitions SOLFX only fit specific helmet ranges, so this immediately narrows your options before price even enters the conversation.
- Decide whether you want a full shield or an insert. A full replacement like the PSLER photochromic shield changes your entire optical experience; an insert like the Pinlock ProtecTINT layers a subtler effect onto a visor you already like.
- Weigh darkening speed against your typical riding conditions. Riders who move through tunnels, forest canopy and open motorway in quick succession benefit most from a fast-reacting OEM shield rather than a gradual film.
- Confirm Pinlock compatibility if you ride in cold, damp UK conditions. Fogging is a separate problem from glare, and the two together cover most of what touring riders actually complain about.
- Set a realistic budget band and match your expectations to it. Films under £15 are a fair way to trial the concept; full OEM shields in the £90-£180 range are where you get verified UV figures and factory-tested optics.
- Factor in UV protection level, not just tint darkness. A visor can look only lightly tinted while still blocking the vast majority of harmful UV — check the manufacturer’s stated percentage rather than judging by eye.
- Think about resale and helmet longevity. If you’re likely to replace your helmet within a year or two, a cheaper aftermarket or film option may make more financial sense than a premium OEM shield tied to that specific lid.
Common Mistakes When Buying a Photochromic Visor
The most frequent error is buying based on the helmet brand alone without checking the specific model fitment — a shield listed for the RF-1200 will not necessarily fit an older RF-1100, and a few millimetres of mismatch is enough to affect the seal. A close second is assuming photochromic automatically means “as dark as a dedicated tinted visor” — as the aggregated forum feedback throughout this guide makes clear, most photochromic shields top out noticeably lighter than a proper smoked visor, which matters if you ride in genuinely intense sun rather than typical UK brightness.
Buyers also commonly skip checking Pinlock compatibility entirely, then discover in November that their lovely sun-reactive shield fogs up solid on the first cold commute. Another recurring mistake is storing the helmet in direct sunlight, which — as covered in the maintenance section above — accelerates the exact degradation that shortens a photochromic coating’s working life. Finally, some riders buy the cheapest film option expecting OEM-level performance; treating a £10 film and a £150 factory shield as directly comparable products sets expectations that neither Pinlock nor common sense would support.
Photochromic Visor vs Tinted Visor vs Pinlock Insert: What’s the Difference?
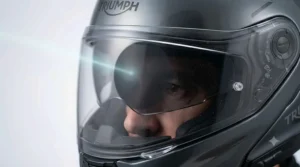
It’s worth being clear-eyed about what each visor type actually does, because they solve overlapping but distinct problems. A standard tinted visor is fixed at one darkness level — reliably dark in bright sun, but dangerously dark if you’re still wearing it after sunset or in a tunnel, which is exactly why UK law restricts how dark a road-legal tinted visor can be. A clear visor plus a separate Pinlock anti-fog insert solves fogging brilliantly but does nothing at all for glare. A photochromic visor, by contrast, adjusts automatically across the full range between those two states, trading some maximum darkness for genuine all-conditions usability.
| Visor Type | Adapts to Light? | Fog Resistance | Night Safety |
|---|---|---|---|
| Standard tinted visor | No | Only with added Pinlock | Poor if still dark |
| Clear visor + Pinlock | No tint at all | Excellent | Excellent |
| Photochromic visor (e.g. Shoei CWR-1) | Yes, automatic | Only if also Pinlock-ready | Good, clears in low light |
The practical takeaway from this comparison is that a photochromic visor is best understood as a genuine third category rather than a straight upgrade over either alternative — it’s the compromise pick for riders who move through multiple light conditions in a single ride, while a dedicated tinted visor still wins for pure track-day sun performance and a clear-plus-Pinlock combination remains unbeatable for pure fog resistance on freezing mornings.
What to Expect: Riding in Changing Light Conditions
The single biggest adjustment for riders switching to a photochromic visor is trusting the lens to catch up rather than manually compensating for it. In practice, changing light conditions riding through a typical UK touring day — dappled tree cover, open moorland, a village high street shaded by buildings, then a stretch of exposed dual carriageway — produces a series of gradual shifts rather than sudden ones, and most riders report the transition becomes genuinely unnoticeable within the first few outings. The one exception, mentioned by owners across nearly every product in this category, is tunnels and sudden deep shade, where the lens simply cannot react instantly; flipping the visor up briefly, as covered in the problem-solving section above, remains the standard fix.
Understanding why this works at all comes down to the underlying chemistry: photochromic compounds embedded in or coated onto the lens undergo a reversible molecular change when exposed to UV radiation, darkening the lens, and revert to their clear state once that UV exposure stops — a process explained in more technical depth on Wikipedia’s overview of photochromic lens technology. Because the reaction depends on UV intensity rather than visible brightness alone, a photochromic visor will still darken somewhat on a bright but overcast day, which surprises some first-time users who expect grey skies to mean a fully clear lens.
Photochromic Visor for All-Day Riding and Touring Visor Comfort
A photochromic visor for all-day riding earns its keep less through any single dramatic feature and more through the accumulation of small comfort wins across a long day in the saddle. Squinting against glare for hours causes genuine muscular fatigue around the eyes, and constantly refocusing between a too-dark and too-light visor adds a low-grade cognitive load that compounds over a 300-mile day — exactly the kind of fatigue that road safety guidance flags as a real contributor to reduced concentration on long rides.
Touring visor comfort also depends on factors that have nothing to do with tint at all: weight, seal quality around the helmet frame, and how easily the shield opens with a gloved hand at speed. None of the seven products above add meaningful weight over a standard visor, since the photochromic layer is either embedded in the polycarbonate itself or applied as a thin film, but riders switching from a very light stock visor to a premium OEM shield like the Shoei CWR-1 sometimes notice a very slight difference in how the shield sits, simply because of the additional Pinlock-ready lip. It’s a minor point, but worth test-fitting before a big trip rather than discovering it for the first time on day one of a tour.
Light Adaptive Visor for Variable Weather: Handling Britain’s Unpredictable Skies
If there’s one country where a light adaptive visor for variable weather genuinely earns its price tag, it’s the UK, where four seasons can plausibly occur within a single afternoon’s ride. Unlike Southern Europe, where sun-then-shade cycles are more predictable, British touring routes swing between bright breaks in cloud cover and sudden drizzle with very little warning, which is precisely the pattern photochromic tech was designed to handle rather than track-day sunshine.
Reviewers consistently note that products with faster reaction speeds — the Bell Transitions SOLFX‘s roughly ten-second full transition being the standout example on this list — cope noticeably better with this kind of rapid British weather-flipping than the gentler curve you get from budget films like WeePro or Systercol. That’s not a knock against the cheaper options, which are genuinely fine for gradually changing conditions over the course of an hour, but it is a real practical difference worth weighing if your typical ride involves the sun going in and out every few minutes rather than settling for a whole afternoon.
Safety, Regulations and Long-Term Value: Is a Photochromic Visor Worth It?
Under British Standard BS 4110:1999, all visors and goggles sold for road use in the UK must carry the BSI Kitemark or an equivalent EEA standard, and the full detail of these requirements — along with helmet approval standards — is set out in gov.uk’s official guidance on motorcycle helmets, visors and goggles. Broadly, road-legal visors in normal daylight conditions need to permit at least 50% light transmission, which is worth checking against a photochromic shield’s stated maximum tint before assuming it’s fully road-legal at its darkest setting.
Beyond legality, eye protection has a genuine long-term health dimension too — prolonged UV exposure while riding contributes to the same cumulative eye strain and glare-related discomfort that opticians warn about more broadly, and it’s worth reading general UV eye-protection guidance such as RNIB’s advice on protecting your eyes from the sun alongside anything visor-specific. On long tours, fatigue compounds this further: broader road safety guidance from RoSPA’s road safety advice hub consistently identifies reduced concentration and slower reaction times among the warning signs riders should watch for, and unmanaged glare is one of several small factors that can nudge a long day toward that state faster than it should.
On long-term cost, a premium OEM shield in the £140-£180 range works out cheaper over several seasons than repeatedly buying separate clear and tinted visors, especially once you factor in not needing to carry a spare shield in your luggage. Budget film options don’t offer the same multi-year value proposition, but they’re not meant to — they’re a low-risk way to test the concept, and pairing your visor upgrade with other touring motorcycle accessories, such as a proper anti-fog spray, a microfibre visor bag, and a tank bag pocket sized for a spare pair of riding glasses, rounds out a setup built for genuinely long days rather than short hops.
Frequently Asked Questions
❓ Is a photochromic visor legal on UK roads?
❓ How long does a photochromic visor take to darken?
❓ Do photochromic visors work with Pinlock anti-fog inserts?
❓ Will a photochromic visor get dark enough for very bright sun?
❓ How long does the photochromic effect last before fading?
Conclusion
Choosing the right photochromic visor for touring riders really comes down to matching the product to how far, how often, and in what conditions you actually ride, rather than chasing the single “best” option on paper. Riders doing serious cross-country mileage will get the clearest return from a tested OEM shield like the Shoei CWR-1 or Bell Transitions SOLFX, where faster reaction times and verified UV figures genuinely earn their higher price over a season of long days. Riders touring occasionally, or simply curious whether the technology suits their riding style at all, are far better served starting with an affordable insert or film — the Pinlock ProtecTINT, WeePro, or Systercol options covered above all offer a low-risk route in.
What ties every product on this list together is the same underlying promise: fewer stops to swap visors, less squinting through unpredictable British light, and one less thing to think about on a long day in the saddle. Whichever price point you land on, checking genuine compatibility with your exact helmet model, confirming Pinlock support if you ride through cold mornings, and being realistic about how dark “photochromic dark” actually gets will save you a returned parcel and a disappointing first ride.
Recommended for You
- Replacement Photochromic Visor: 7 Best UK Picks for 2026
- Transitions Visor for Motorbike Helmet: 7 Top UK Picks (2026)
- Mirrored Visor for Motorcycle Helmet: 7 Best UK Picks (2026)
Disclaimer: This article contains affiliate links. As an Amazon Associate, I earn from qualifying purchases. If you purchase products through these links, we may earn a small commission at no additional cost to you.
✨ Found this helpful? Share it with your friends! 💬🤗
